Automate Your Blog Workflow: Stop Wasting Hours on Form Submission
Content creators waste hours on repetitive form submission for guest posts, syndication, and newsletters. This guide shows you how to automate blog workflows using a knowledge base and AI-powered form filling.

The modern content creator faces a paradox. You’re expected to publish consistently across multiple platforms, build authority through guest posting, syndicate your work to reach new audiences, and respond to media requests. But every distribution opportunity comes with the same barrier: another form.
Guest post guidelines want your bio, previous writing samples, and social proof. Newsletter submission forms demand formatting preferences and publication history. Podcast guest forms require expertise areas and talking points. Even HARO requests need your credentials and availability.
Multiply this across 10-20 submissions per week, and you’re staring at 3-5 hours of repetitive data entry. That’s 120-180 hours per year—time that should go into creating exceptional content, not retyping your bio for the fiftieth time.
Most content automation tools focus on the wrong problem. They’ll write your posts for you, but they won’t help you get those posts published. They’ll generate email drafts, but they won’t fill the submission forms that actually distribute your work. While traditional autofill tools have limitations, an AI-powered form filler offers the intelligence to understand context and answer complex questions.
This guide shows you how to eliminate the administrative friction from your blog workflow by automating form submission with a centralized knowledge base and AI-powered form filling.
What Is Blog Workflow Automation Really?
Blog workflow automation is often misunderstood as “using AI to write posts.” That’s only one piece—and honestly, not the most important one for most creators.
The real bottleneck in content creation isn’t writing; it’s distribution. Writing a 2,000-word post might take 4 hours. Getting that same post published across guest blogs, newsletters, and syndication platforms can take 8-12 hours of form submission, follow-up emails, and administrative coordination.
Blog workflow automation at the distribution level means:
- Eliminating repetitive data entry - Your bio, expertise areas, social links, and publication history live in one place and flow into any form automatically
- Maintaining consistency - Your bio reads the same whether it’s on your fifth guest post of the week or a HARO response
- Scaling submission volume - Apply to 10 guest blogging opportunities in the time it used to take for one
- Reducing errors - No more typos in email addresses, broken links in bios, or inconsistent job titles
The workflow shift is simple: from “write → research → submit manually → repeat” to “write → submit automatically with one click → reach more audience.”
Step-by-Step: Automating Blog Workflows with VeloFill
VeloFill automates form submission by combining a centralized knowledge base with intelligent field recognition. The AI analyzes form fields and populates them with the appropriate information from your stored data.
Here’s how to set up your automated blog workflow in under 15 minutes.
Step 1: Install and Configure VeloFill
Install the VeloFill browser extension for Chrome, Firefox, or Edge, then connect it to your preferred AI provider following the LLM configuration guide. VeloFill works with any OpenAI-compatible endpoint—including local models via Ollama for complete privacy.
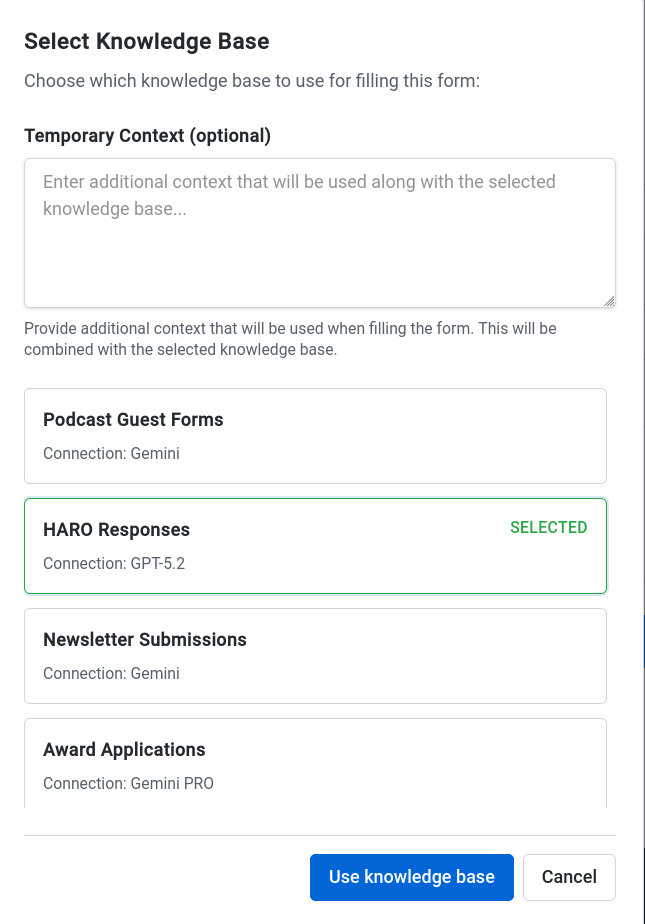
Step 2: Create Your Content Creator Knowledge Base
Navigate to Options → Knowledge Bases and click Add Knowledge Base. Name it something descriptive like “Content Creator Profile” or “Guest Post Kit.”
This knowledge base will be your single source of truth for all submission forms. The key is to structure it so the AI can quickly retrieve the right information for any form type.
Step 3: Structure Your Knowledge Base Content
Organize your information into clear sections. This makes it easier for the AI to understand context and fill forms accurately.
Identity and Contact Information:
Full Name: [Your name]
Professional Title: [Consistent title - e.g., "Content Marketing Specialist" not "Writer" one place and "Marketing Pro" another]
Email Address: [Professional email]
Phone Number: [Optional - include if relevant]
Website: [Your primary website or blog]
LinkedIn Profile: [Full URL]
X/Twitter Handle: [@handle]
YouTube Channel: [If applicable]
Instagram Handle: [If applicable]
Professional Bio:
Short Bio (50 words): [Concise version for quick forms]
Medium Bio (150 words): [Standard guest post bio]
Long Bio (300 words): [Detailed version for about pages or awards]
Include different lengths so the AI can select appropriately based on character limits or form requirements.
Expertise Areas:
Primary Topics: [2-3 core areas you write about - e.g., "SaaS content marketing, SEO strategy, startup growth"]
Secondary Topics: [Related topics - e.g., "Email marketing, social media strategy, analytics"]
Industries: [Specific industries you cover - e.g., "B2B SaaS, fintech, e-commerce"]
Target Audience: [Who you write for - e.g., "Founders, marketers, product managers"]
This structure works similarly to job application automation, where a well-organized CV powers instant form fills. Your knowledge base becomes your digital identity system.
Content Portfolio:
Top 3 Articles: [Links to your best-performing work with brief descriptions]
Guest Post Examples: [3-5 links to guest posts on reputable sites]
Media Mentions: [Any press coverage or interviews]
Podcast Appearances: [Shows you've been on, with links]
Submission Preferences:
Exclusivity Terms: [Your stance - e.g., "Willing to discuss exclusivity for high-traffic sites"]
Publication Timeline: [Typical turnaround time - e.g., "Able to deliver within 1-2 weeks for approved topics"]
Formatting Preferences: [Any specific requirements - e.g., "Comfortable with Markdown, HTML, or Google Docs"]
Call to Action: [Standard CTA you include - e.g., "Follow me on X: @handle for daily content tips"]
Headshot and Assets:
Headshot URL: [Link to high-quality headshot]
Author Image Alt Text: [Description for accessibility]
Logo URL: [If you have a personal brand logo]
Pro Tip: Use clear, descriptive headers and consistent formatting. The AI reads your knowledge base structure, so well-organized data leads to more accurate form fills.
Step 4: Automate Your First Guest Post Submission
Navigate to any guest post submission form. Click the VeloFill extension icon, select your “Content Creator Profile” knowledge base, and click Analyze Form.
VeloFill will:
- Identify each form field and its label
- Understand the field type (text, dropdown, radio button, textarea)
- Match it to the appropriate information in your knowledge base
- Populate the field with the correct data
Review the filled form to ensure accuracy—especially for any customized responses—then submit.
Common Form Scenarios for Content Creators
The real power of this workflow is its flexibility across different form types. Based on 15-25 submissions per month at 5-10 minutes each, active content creators spend 120-180 hours annually on repetitive form entry. Let’s break down the five form types you’ll encounter most frequently.
Newsletter Submissions
Submitting to newsletters is one of the highest-leverage distribution channels, but each newsletter has different requirements. Common fields include:
- Article Title and Summary - VeloFill pulls from a “Recent Work” section or generates a summary if you add article descriptions to your knowledge base
- Target Audience - Matches against your stated audience demographics
- Exclusivity Terms - Uses your predefined exclusivity stance
- Publication Rights - Fills republication preferences
Workflow Tip: Many newsletters use Google Forms for submissions—our Google Forms automation guide shows you how to breeze through those specific forms.
Workflow Tip: Add a “Recent Articles” section to your knowledge base with your last 3-5 posts. Update this monthly so your latest work is always ready for submission.
Podcast Guest Applications
Podcast submission forms typically request:
- Expertise Areas - Automatically populated from your topics section
- Talking Points - If you add sample talking points to your knowledge base, the AI can select or generate relevant ones
- Previous Appearances - Pulled from your portfolio
- Promotional Commitments - Uses your stated promotional preferences
Award Applications
Award nominations are time-consuming because they require detailed, specific information. Structure your knowledge base with a “Case Studies” or “Notable Projects” section:
## Notable Projects

### Project Name
What it was: [Brief description]
Impact: [Metrics - e.g., "Increased organic traffic by 340%"]
Timeline: [When it happened]
Recognition: [Awards, media coverage, case studies]
Links: [To the work itself or coverage]
This structure gives the AI detailed, quantifiable data that award forms frequently request.
HARO and Media Requests
When journalists request sources through HARO or similar platforms, speed matters. Your knowledge base should include:
## Media Credentials

Years Experience: [Number]
Published Work: [Link to portfolio]
Previous Media Mentions: [List with links]
Expertise Areas: [Specific topics you can comment on]
Availability: [Response time and interview preferences]
When a relevant request appears, you can respond in seconds with your complete credentials.
Advanced Strategy: Multiple Content Personas
As you grow as a creator, you might write for different audiences or maintain multiple content brands. Instead of one giant knowledge base, create specialized profiles for better accuracy and context switching.
Examples:
- “Guest Post Profile” - Focused on your bio, expertise, and portfolio for guest blogging
- “Newsletter Profile” - Includes article summaries, target audience data, and CTA specifics
- “Podcast Guest Profile” - Emphasizes talking points, previous appearances, and promotional commitments
- “Award Nomination Profile” - Contains project details, metrics, and case studies
- “HARO Responder Profile” - Streams credentials, expertise areas, and media mentions
This multi-profile approach is especially powerful. B2B marketers use the same strategy to maintain separate personas for enterprise vs. SMB outreach.
Switching between profiles takes one dropdown selection, letting you tailor your submission to the opportunity in seconds.
Best Practices for Accurate Autofill Results
Use Context-Specific Sections
Organize your knowledge base with clear, descriptive headers. The AI reads these headers to understand context.
Good:
## Guest Post Bio
Your bio here...

## Newsletter Preferences
Your preferences here...
Avoid:
Bio info
More bio stuff
Other info
Keep It Fresh
Update your knowledge base regularly:
- Add new articles to your portfolio monthly
- Refresh metrics and achievements quarterly
- Update contact information immediately when it changes
- Revise bios when your positioning shifts
Use Temporary Context for Customization
Sometimes a form needs a customized response. Instead of permanently editing your knowledge base, use VeloFill’s Temporary Context field for one-time instructions.
Example: “For this submission, emphasize my experience with B2B SaaS and include my recent case study about HubSpot migration.”
The AI will apply this guidance for the current session only, leaving your main knowledge base untouched.
Review Before Submit
While VeloFill is highly accurate, always review filled forms before submitting—especially for:
- Personalized responses to specific questions
- Numbers, dates, and other data that should match the current opportunity
- Any fields that seem unusually filled or left blank
This quick check catches edge cases and ensures every submission looks thoughtful.
Security and Privacy for Content Workflows
Your content portfolio, credentials, and professional data are valuable assets. VeloFill is designed with privacy as a core principle:
Local Storage: All knowledge bases are stored in your browser’s IndexedDB. No data is uploaded to VeloFill servers—because there are no VeloFill servers.
BYOK Architecture: You connect to the AI provider of your choice using your own API keys. Your prompts go directly from your browser to your selected provider.
Vault Encryption: Enable vault encryption in the security settings to protect sensitive knowledge bases with AES-256-GCM encryption. Even if someone accesses your browser, they can’t read your encrypted data without your master password.
Local AI Support: Connect VeloFill to Ollama or similar local models for complete data isolation. When using local AI, your submission data never leaves your machine.
For a deeper dive into security architecture and prompt injection protection, see our detailed comparison of AI form filler security.
This matters for content creators who frequently share sensitive information: unpublished article ideas, proprietary strategies, confidential client details, or personal contact information. With VeloFill, you control where that data goes.
The Hidden Time Sink You Can Eliminate Today
Most content creators focus on optimizing their writing process—finding the perfect AI writer, setting up editorial calendars, building content templates. But the administrative friction of form submission remains an overlooked bottleneck.
The math is straightforward: 120-180 hours annually based on 15-25 submissions per month at 5-10 minutes each. By eliminating this administrative friction, you reclaim 3-4 full work weeks for what matters most—creating exceptional content.
More importantly, automated distribution changes your behavior. When submission is frictionless, you’re more likely to:
- Apply to more guest posting opportunities
- Submit to more newsletters
- Respond to HARO requests faster
- Nominate your work for awards
This distribution compound effect is where real audience growth happens. You create less friction between your content and the people who need to see it.
Get Started Automating Your Blog Workflow
Setting up your automated blog workflow takes less than 15 minutes:
- Install VeloFill for your preferred browser
- Configure your AI connection with your preferred provider
- Create your first knowledge base with your content creator profile
- Test on a newsletter submission or guest post form
- Scale by creating specialized profiles for different submission types
You’ve spent years refining your craft and building an impressive portfolio. Don’t let administrative busywork slow down your distribution.
Start automating your blog workflow today.
Install VeloFill and turn hours of form submission into seconds of one-click automation.
Related reading

Gemini in Google Forms (2026): Create Forms with AI, Fill Forms with VeloFill
Gemini is for building forms and reviewing responses inside Google Forms. VeloFill is for filling forms repeatedly across websites with consistent context.
Read more →
AI Form Filler Extension: Safer Than AI Browsers
Browser extensions and AI browsers take fundamentally different approaches to AI form filling. This guide explains the security architecture differences, prompt injection risks in AI browsers, and why extensions provide a safer foundation for professional use.
Read more →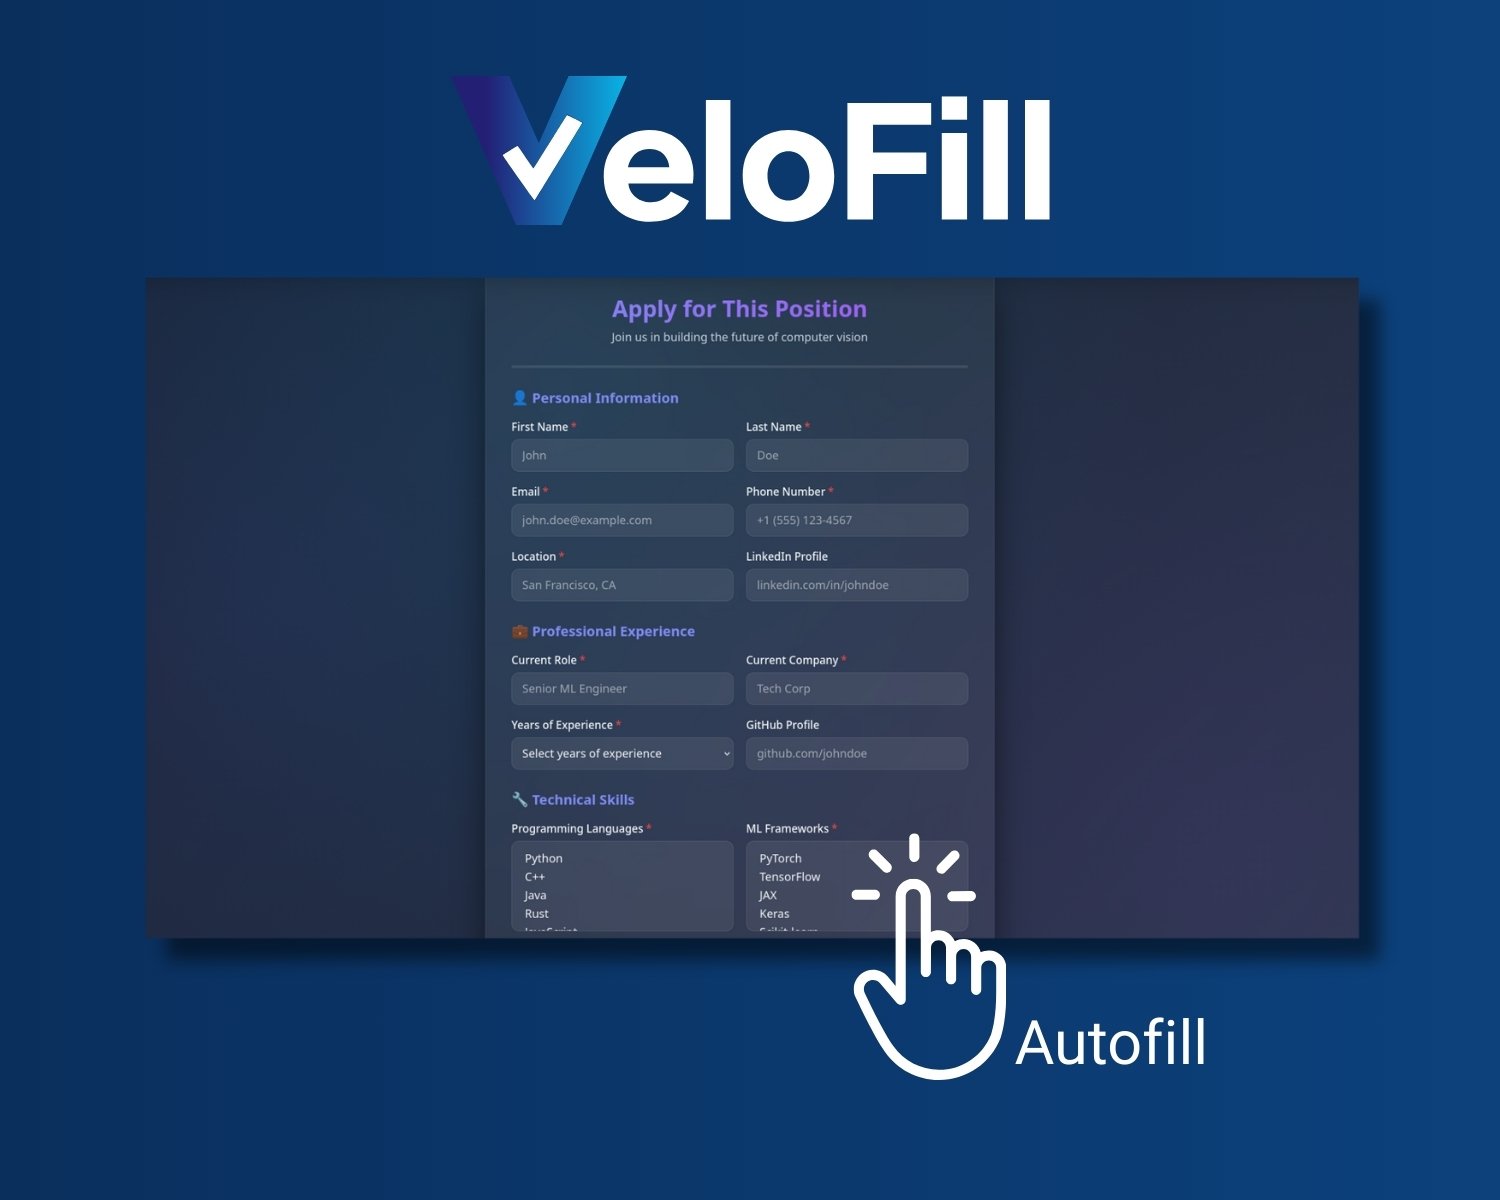
ChatGPT Autofill Forms: 3 Ways to Fill Web Forms with AI (Safely)
Three realistic ways to fill web forms faster with AI: copy/paste with a reusable prompt, writing assistance with ChatGPT's Atlas browser, and secure one-click autofill using a private knowledge base with VeloFill.
Read more →Need a guided walkthrough?
Our team can help you connect VeloFill to your workflows, secure API keys, and roll out best practices.